FF1 Character Classes: All Jobs Explained
As you’d expect, the first Final Fantasy is the starting point for many series traditions - including that of character classes, with each playable party member fitting into a specific job class that you’ll likely be very familiar with even if you’ve never played FF1 before.
The character classes in FF1 form a basis for much of the series - not just in the sequels with explicit job systems, but also in specific characters throughout the other FF adventures. FF9’s Vivi is a direct descendant of an FF1 Black Mage, for instance. Yang, Tifa, and Zell are relations of the Black Belt. The skills of FF7’s Yuffie are those of a Thief and a Ninja - which aligns precisely to one of FF1’s job classes.
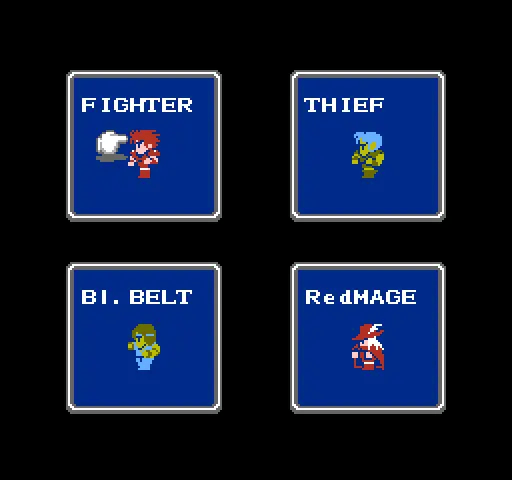
In the first Final Fantasy, you have four slots in your character party and six different job classes to choose from. That leaves you with a conundrum: how do you pick the best team for FF1 and its challenging adventure? And obviously, before that, you have to learn about and decide which the best of FF1's character job classes are for you. On this page we aim to detail all this - and more…

Fighter
The archetypal RPG warrior class, it’s your primary physical damage dealer, leading from the front. It has no magic at first, but can later learn low-end White Magic, adding minor support functions. For most people, the Fighter will be the anchor of their team.
- Starting Stats: 35 HP / 10 Damage / 10% Hit / 0 Absorb / 53% Evade
- Promotion - Knight: Can use more weapons and armor, and is able to use low-level White Magic.
Black Belt
In later FF titles, this class becomes the Monk. They miss quite often, and are challenging at lower levels, but the higher level they get, the more devastating they become. While you can equip weapons to them, don’t - they should fight with bare hands. Early on you might find them a bit weak, but picking them pays off in the late game. Key to this is the Absorb stat, which allows the Black Belt to nullify incoming damage an increasing amount as it levels up.
- Starting Stats: 33 HP / 2 Damage / 5% Hit / 1 Absorb / 53% Evade
- Promotion - Grand Master: Obtains no new moves, but is drastically more powerful.
Thief
A defining class for the series, the Thieves are held back by their choice of weapons - which kinda sucks. However, the Thief has the highest chance at escaping from battles, which is really useful early on. In the late game, Thief promotes to Ninja - and the Ninja gets much more access to weapons, armor, and even some magic - which immediately transforms it into a fast, hard-hitting powerhouse.
- Starting Stats: 30 HP / 2 Damage / 5% Hit / 0 Absorb / 58% Evade
- Promotion - Ninja: Can use many weapons and perform low-level Black Magic.
Black Mage
The archetypal mage, later in the game it’s promoted to the Black Wizard. It can learn all of the black magic spells in the game. It’s multi-target attack spells can help you to quickly mop up large enemy mob groups in random encounters, while powerful spells can blast down bosses. Just be warned it’s the squishiest class, with the lowest HP.
- Starting Stats: 28 HP / 2 Damage / 5% Hit / 0 Absorb / 53% Evade
- Promotion - Black Wizard: Unlocks the most powerful Black Magic spells.
White Mage
Unless you’re doing some sort of novelty run, a White Mage is a must-have for your class, as they’ll be your primary healer, promoting into the White Wizard later in the game. As well as healing and buffs, the White Mage can use their spells to annihilate undead monsters.
- Starting Stats: 28 HP / 2 Damage / 5% Hit / 0 Absorb / 53% Evade
- Promotion - White Wizard: Unlocks the most powerful White Magic.
Red Mage
A jack of all trades but master of none, the Red Mage can use both Black and White magic, plus some heavy armor and weapons. They’re all-rounders, a combination of the two mages and fighter, but not as good in any single area as any of the three. A truly physically-based party could swap their mages for a Red Mage, however - you’d just have a more limited spell list.
- Starting Stats: 30 HP / 5 Damage / 7% Hit / 0 Absorb / 58% Evade
- Promotion - Red Wizard: Enables the use of a wider range of equipment and spells.
FF1 Best Team Options: The Best Job Loadouts
Naturally, the first Final Fantasy is an open-ended RPG, and that means one core thing - there isn’t really one absolute best team or party setup in FF1. Some setups might be preferred by certain players because they fit a particular play-style or offer a unique challenge. Below are some of the best team options and party class loadouts:
The Classic Party - Fighter / Black Belt / Black Mage / White Mage
This setup is one of the most iconic in Final Fantasy I, representing a balanced team that covers all the essential bases. While it may not be the absolute strongest combination, it’s a classic for a reason, providing a solid foundation for tackling the game’s challenges.
At the start, the Fighter will be your primary physical attacker, leading the charge with superior strength and defense. The Black Mage quickly catches up, providing crucial offensive magic to handle multiple enemies and deal significant damage in tough battles. However, the real late-game powerhouse is the Black Belt. Once promoted to Master, the Black Belt’s raw, gear-free strength allows them to surpass even the Knight in physical power.
One key benefit of the Black Belt is their minimal gear dependency. This frees up money to be spent on upgrading the Fighter’s armor and weapons and investing in spells for both the Black Mage and White Mage. In the late game, the Level 4 Black Magic spell Fast/Haste becomes critical, allowing you to boost the attack speed and damage output of both the Knight and Master, making them even more formidable.
This party setup provides a nice balance between physical and magical power, with a focus on building up the Black Belt over time to create a strong, cost-effective team for both early and late game.
The Classic Party II - Fighter / Thief / Black Mage / White Mage
This party setup is a variation of the classic lineup, offering a balanced mix of physical strength and magical power. With both Black and White magic available from the beginning, you can handle both offensive magic and healing effectively. The Fighter, as always, remains your go-to physical attacker, leading the charge in battle.
However, this setup comes with a higher cost. The Thief, while fast and nimble, is frail and requires constant gear upgrades to stay effective in combat. Meanwhile, maintaining spell progressions for both the Black Mage and White Mage adds to your expenses. Early on, this party may feel like a slow burn as you carefully manage resources to keep everyone equipped and powerful.
Where this party truly shines is in the late game. Once promoted, the Thief evolves into the Ninja, gaining access to a wider variety of weapons, armor, and low-level magic. The Fighter’s promotion to Knight also allows for some White Magic use, making this party highly versatile. By the end, all four characters will have access to magic, turning this initially challenging team into a well-rounded, formidable force.
Consider this setup a strategic investment—while it may take time to reach its full potential, the payoff is a highly capable party that can adapt to most challenges in the game.
Low Healing Powerhouse - Fighter / Thief / Black Mage / Red Mage
This setup takes a slight deviation from the classic party by replacing the White Mage with a Red Mage. While you won’t have access to the strongest healing spells, you still retain some healing capabilities thanks to the Red Mage, and later in the game, the Knight (evolved from Fighter) can also pick up some healing magic.
The Fighter serves as your mainstay throughout the game, tanking hits and dealing consistent physical damage. The Thief will start off weaker in terms of offense but grows into a powerful asset once promoted to Ninja, gaining access to better gear and magic. Until then, you’ll need to focus on keeping them well-equipped to contribute to the team effectively.
Much of your resources will be invested in spells for your Black and Red Mages, so scavenging gear from dungeons will be crucial to save money. This setup truly shines in the late game when the Thief becomes a Ninja and the Knight unlocks its full potential, turning this team into a damage-dealing powerhouse, even with its limited healing options.
All Out Attack - Fighter / Fighter / Fighter / Red Mage
If you're looking for a straightforward, no-nonsense approach to combat, this class setup is all about brute force. With three Fighters leading the charge, you'll have unrivaled attack power and strong defense from the start of the game. This party setup is designed to overwhelm enemies with raw physical strength, meaning you won’t need to worry much about magic until later in the game.
The Red Mage plays a supporting role, providing just enough magic to cover healing and utility spells. While the Fighters dominate in battle, the Red Mage helps balance things out with basic healing and buffs. However, you’ll need to be mindful of your resources early on, as equipping all three Fighters with strong gear can get expensive, especially in the mid-game.
By the time you reach the endgame, your Fighters will have evolved into Knights, capable of using White Magic, making them even more versatile. This setup transforms into a powerhouse that can steamroll through most encounters with ease. Though it may lack the tactical complexity of other setups, it offers an undeniably strong and effective way to play—perfect for players who want to focus on pure strength. Just be aware that it can become a bit repetitive for some.
The Magicians - Red Mage / Red Mage / Black Mage / White Mage
This party setup focuses heavily on magic, offering a different approach compared to the more physically-based parties like ‘The Classic.’ Instead of relying on brute strength, you’ll be using two Red Mages to balance between offense and defense, while still keeping a Black Mage and White Mage for specialized magic duties.
In the early game, the abundance of magic gives you an edge, allowing you to tackle enemies with spells that target multiple foes. However, as the game progresses, you’ll start to see the limitations of the Red Mage class, especially in terms of physical attack power. This party setup can also be expensive, as you'll need to continually invest in equipping and upgrading spells for all of your magic users.
The Red Mages can hold their own early on, but as you move deeper into the game, the gap between them and true physical attackers like Knights or Black Belts will grow. That being said, this party setup can be incredibly satisfying when executed well, particularly when you unleash a coordinated barrage of powerful spells to annihilate bosses in record time. However, be mindful: this setup is not for everyone and requires a careful balance of resources and strategy.

Class Upgrades in FF1: The Advanced Knight, Master, Ninja, and Wizard Jobs
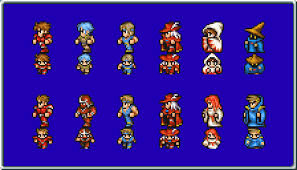
In the first Final Fantasy, each of the six classes features an evolved form. These promotions are class upgrades that change the name and in-game appearance of each character as part of a job class upgrade - but it also has a direct effect on their abilities.
Your exact job upgrade options will depend on the initial party composition you decided on; each job upgrades in a linear fashion, which means your four ultimate upgraded classes will be directly descended from your choice when you were faced with choosing job classes at the very beginning of FF1.
If you’re viewing this page before starting the game, consider your starting job classes carefully, choosing the best team for you. With a team decided, it's then time to learn about the various advanced job upgrades in FF1 and how to unlock the class promotions.
Getting the job promotion is a big deal, as each class upgrade significantly benefits each of the party members. Generally speaking, you can expect the change to unlock new skills, more equipment options, higher stats, and more. Some of the best weapons in FF1 are only available to the advanced, upgraded classes. Specifically:
- Warriors class upgrade to the Knight, gaining the ability to carry more weapons and armor and the further ability to cast some basic level white magic spells.
- Knight Spells: Cure, Protect, Blink (Level 1) / Blindna, Silence, NulShock, Invis (Level 2) / Cura, NulBlaze (Level 3)
- Monks class upgrade to the Master. This is one of the broadly least impressive upgrades in the game, as they don’t gain any new abilities - but the Master gets incredibly stat upgrades as they hit later, higher levels - which can make them the deadliest damage dealers in the game.
- Thief gets its class upgrade to the Ninja. Thieves are weak, but their speed is their strength - but the upgrade to Ninja unlocks a vast variety of weapons and armor, and levels 1-4 of black magic, making them formidable attackers.
- Ninja Spells: Fire, Bolt, Focus, Sleep (Level 1) / Ice, Slow, Dark, Steel (Level 2) / Fire2, Bolt2, Bind, Focus2 (Level 3) / Ice2, Haste, Sleep2, Muddle (Level 4)
- Black Mage gets a class upgrade to the Black Wizard, which in turn unlocks all forms of Black Magic and a few more equipment options. Once a Black Wizard, this class can use all eight levels of Black Magic.
- White Mage will upgrade to the White Wizard, which like its black counterpart unlocks every type of White Magic and some good weapons. The real boon is all eight levels of White Magic, which is great for healing but also battling the undead.
- Red Mage takes a class upgrade to the Red Wizard. This upgrade doesn’t unlock all levels of spells, but gives you a smattering selection from the first seven levels, plus a wide range of weapons and armor. They remain a very viable all-rounder.

The character job upgrade can be obtained later in the FF1 story. Once you’re a way into FF1, after beating the Ice Cavern, you’ll need to gain access to the airship to continue the story. You’ll need to use the airship to fly to an area of the map where there’s a bunch of smaller islands that connect the two large northern landmasses.
Here there’s the Dragon Cave, which is home to Bahamut, King of Dragons. This is Bahamut’s first appearance in the FF series, of course, and while it’s a more basic one, he at least carries an awesome, memorable reward… if you can get him what he wants.
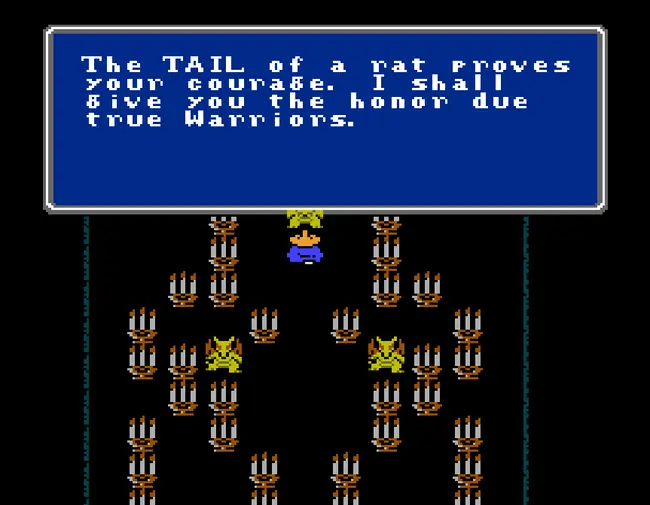
You need to bring Bahamut the Rat’s Tail key item, which can be grabbed from the nearby Citadel of Ordeal/Citadel of Trials (depending on your version of FF1), found just east of the caves and islands. This is a simple area, and the Rat’s Tail is waiting to be grabbed at any point once you can access the area - though you will have to beat one of FF1's few optional boss battles to get the item you require.
Get the Rat’s Tail and take it back to Bahamut to get your class upgrades. There’ll be a scene, and on the other side of it, each of your character classes will be upgraded and promoted to their ultimate class form - which will unlock new skills and abilities and prepare you for the later stages of FF1’s adventure.
